I meditate on your precepts
and consider your ways.
I delight in your decrees;
I will not neglect your word.
~Psalm 119:15-16
In my third post last year of a series I started writing called "Spend More Time with God", I shared about how I write Bible verses I want to memorize on index cards and tape them up in certain well-frequented areas in my house where I can see them often to aid in memorization. Although having white index cards taped up all over your home can be helpful to your Scripture memorization efforts, unfortunately, they're not very pretty. I knew there had to be a more attractive, decor-friendly way to display my Scripture cards, but I just had no idea or inspiration of how to go about this. So for years I've had white cards taped up by my kitchen and bathroom sinks. Boring. Kind of messy-looking. Not a good thing for this clean freak momma.
So while I was in deep thought and prayer about writing this series on what I do for my personal devotions and spiritual growth, I experienced a moment of sheer creativity (which rarely happens to me since I'm not very artistic, so once I got over the shock I went with it!). Here was my creative inspiration: what about using mod-podged mini clipboards to display the verse cards? Eureka!
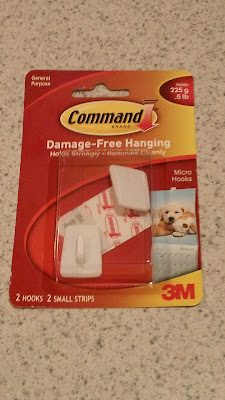
Of course I immediately got busy shopping for supplies. I found 2 plain hardboard mini clipboards at Menards - each for just over $1 (I'm telling you, you save big money there). Add in a bottle of Mod Podge, a few sheets of pretty scrapbook paper, some coordinating ribbon, a sea shell (Say what? You'll see...), a small 3M Command wall hook, and a small suction cup hook. And now I have 2 very cute Scripture card clipboards that match my bathroom and kitchen decor!
Of course I immediately got busy shopping for supplies. I found 2 plain hardboard mini clipboards at Menards - each for just over $1 (I'm telling you, you save big money there). Add in a bottle of Mod Podge, a few sheets of pretty scrapbook paper, some coordinating ribbon, a sea shell (Say what? You'll see...), a small 3M Command wall hook, and a small suction cup hook. And now I have 2 very cute Scripture card clipboards that match my bathroom and kitchen decor!
What follows is how I made my very own mod podge clipboards. I found instructions online for mod-podging clipboards at two different sites (Small Family Big World and Echos of Laughter ), but incorporated the instructions from both and made some adjustments to create my own.


You will need:
- mini clipboard
- scrapbook paper
- Mod Podge
- paint brush or sponge
- scissors
- X-Acto knife or box cutter
- pencil
- newspaper or other table cover
- 3M Command wall hook or suction cup hook (for hanging on mirror or window)
- embellishments (optional)
- glue/hot glue

Step 1:
On the back side of the scrapbook paper, trace around the clipboard.
- mini clipboard
- scrapbook paper
- Mod Podge
- paint brush or sponge
- scissors
- X-Acto knife or box cutter
- pencil
- newspaper or other table cover
- 3M Command wall hook or suction cup hook (for hanging on mirror or window)
- embellishments (optional)
- glue/hot glue


Step 1:
On the back side of the scrapbook paper, trace around the clipboard.

Cut diagonal slits from each corner of paper all the way to each corner of traced section.
Yes, if you couldn't tell by now, I'm left-handed. Please refrain from all left-hander jokes at this time, thank you. I've heard them all by now anyway. You try to sit in a school desk that has the attached writing table only on the right side. Or have random people comment on your left-handedness nearly every time you write in public. Like, wow, it's really that noteworthy. Oops, sorry, a little sensitive about it. But you know you noticed it and would have commented on it had we been together in person while I was cutting. That is, unless you too are left-handed and then it just looks normal.

When you're done cutting the corner slits, your paper should look like this.

Step 3:
Lay back side of paper over the top of clipboard and using X-Acto knife or box cutter, cut around the clip part of board. Also cut off the very top middle part of paper above clip part.
Please notice I put the box cutter on the right side for this photo to be fair and give visual aid to all you right-handers out there.

Now the back side of your paper should look like this.
Please notice I put the box cutter on the right side for this photo to be fair and give visual aid to all you right-handers out there.

Now the back side of your paper should look like this.

And this photo shows what the cut-out part of the front side should look like, so that it will snugly fit around the clip.

Okay, now you're ready to mod podge. Yay! Open a window, though. It has a strong smell and I'm not so sure how good it is for the old brain cells.
First, coat the top of the clipboard with a layer of mod podge. Remember to protect your table surface. Mod Podge is really hard to wash off (learned that from experience, folks)!

Step 5:
Then quickly paint a coat of mod podge on the back of the scrapbook paper and gently press on the top of clipboard, carefully pulling the sides of paper around to the back of clipboard. Press paper down on all sides of clipboard, gently smoothing out wrinkles.

Step 6:
Next, gently paint on 1-2 coats of mod podge over the scrapbook paper on the top, sides, and back of the clip board. If doing 2 coats, let dry for about 15 minutes between coats.
This yellow clipboard is for my kitchen. Pretty! I love tone-on-tone patterns.

Step 7:
Embellish! I glued on some coordinating ribbon. Make sure to wrap it around the sides of the clipboard, gluing all the way around to the back.
Embellish! I glued on some coordinating ribbon. Make sure to wrap it around the sides of the clipboard, gluing all the way around to the back.
I also tied a little ribbon to the clip. Adds a little extra flair, don't you think?
I wanted to fit 2 verse cards on this clipboard, so I found these amazing sticky note holders at the local teacher's supply store. They have an adhesive side on the back that sticks to just about any surface and is completely removable and re-adjustable. And they are designed to hold up a piece of paper as thin as notebook or printer paper, or as thick as cardstock. Love! What will they think of next?

Step 8:
Hang it up where you'll see it often! I hung up my kitchen clipboard with a 3M Command hook next to the sink, where I can easily read it while doing one of my most dreaded and never-ever-ending chores: dish washing.
Hang it up where you'll see it often! I hung up my kitchen clipboard with a 3M Command hook next to the sink, where I can easily read it while doing one of my most dreaded and never-ever-ending chores: dish washing.

Yellow and green are such happy colors. Perfect for the kitchen where I spend countless minutes each day (and not always happily enjoying what I'm doing in there!).

Now for my beach-themed master bathroom clipboard, I used 2 pieces of scrapbook paper - one is ocean waves (or lake waves! I'm a big Lake Michigan lover!) and the other is a sandy beach. I mod-podged the waves paper over the clipboard first. Then cut a bottom section out of the sandy beach paper.

I mod-podged the beach paper over the bottom of the clipboard until it looked like...

THIS! Cute, or what?

Then I glued on a sea shell my mom brought me back from a recent trip to Myrtle Beach.

Now, simply add a Scripture card...

Hang it up on the bathroom mirror with a suction cup hook and viola! You are ready to memorize and meditate on a favorite verse while you floss your teeth! But watch out for flying floss shrapnel. You don't want to get your pretty Scripture card clipboard dirty.

I guess I'm not as artistically-challenged as I had previously thought. Wonders never cease.
So, what do you think? Are you going to make a Scripture card mini clipboard like mine or do you have any other creative display ideas to share? I'd love to hear about it! Please share in the Comments section below!
In Christ,
Suzy


